先日、突然EC2からのメール送信が必要ということが発覚したときの顛末を紹介します。
公開日当日に、突然以下のような内容のメールが届きました。
Dear EC2 Customer,
You recently reached a limit on the volume of email you were able to send out of SMTP port 25 on your instance:xxxxxxx
EC2内のMTAからメールを送信するプログラムでは、そのままだと上記のようなメールが届き、
メールの送信制限に引っかかります。
その為、メールの上限解除申請フォームから解除申請とメールドメインの逆引き申請を行う必要がありました。
この時点で、例えば以下の内容(メールアドレスやサーバー名などはサンプルです)で、メールを送信してみます。
  # php -a
> mail("memorycraft@gmail.com", "Subject1", "Body", "From: server@memorycraft.jp");
この時点ではメールヘッダの内容は、例として以下のようになっていました。
Return-Path:
Received: from ip-10-132-10-146.localdomain (ec2-54-248-82-123.ap-northeast-1.compute.amazonaws.com. [54.248.82.123])
    by mx.google.com with ESMTP id qc4si62972240pbb.326.2013.01.08.08.20.17;
    Tue, 08 Jan 2013 08:20:17 -0800 (PST)
Received-SPF: neutral (google.com: 54.248.82.123 is neither permitted nor denied by best guess record for domain of root@ip-10-132-10-146.localdomain) client-ip=54.248.82.123;
Authentication-Results: mx.google.com; spf=neutral (google.com: 54.248.82.123 is neither permitted nor denied by best guess record for domain of root@ip-10-132-10-146.localdomain) smtp.mail=root@ip-10-132-10-146.localdomain
Received: by ip-10-132-10-146.localdomain (Postfix, from userid 0)
 id E5D5C1E1D; Wed,  9 Jan 2013 01:20:16 +0900 (JST)
Received-SPFとAuthentication-Resultsがneutralになっているのが問題のようで、
これらがpassになっていないとメーラーによっては迷惑メールとして扱われて
しまうことがあるようです。
一応申請したものの、すぐに解除されるわけではないので、次善策としてSESを利用するのはどうかという意見が
ありました。
そこで、まずプロダクション使用申請フォームからSESのプロダクション申請を行いました。
ただし、これもすぐには通らないので、既にプロダクションモードになっている別の社内アカウントのSESを
一時的に使うことにしました。
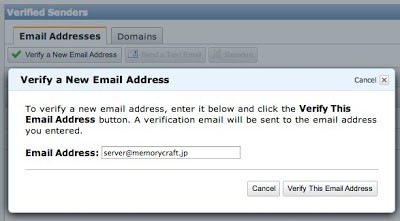
まず、SESで送信元のメールアドレスを認証させる為に、メールアドレスを登録します。
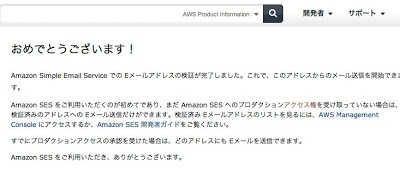
確認メールが送られてくるのでリンクをクリックして認証します。 そうすると、以下のような画面が表示されます。
また、SESのAPIを使うようなプログラムの変更はなるべく避けたいのでメールを送信しているEC2内のpostfixから
リレーする必要があります。
ここで、suz-labブログの記事「PostfixからSESにリレー(stunnel使わない編)」が参考になりました。
この記事に従って設定していきます。
/etc/ssl/certs/ca-bundle.crtがあることを確認して、/etc/postfix/main.cfの末尾に以下を追記します。
relayhost = email-smtp.us-east-1.amazonaws.com:25
smtp_sasl_auth_enable = yes
smtp_sasl_security_options = noanonymous
smtp_sasl_password_maps = hash:/etc/postfix/sasl_passwd
smtp_use_tls = yes
smtp_tls_security_level = encrypt
smtp_tls_note_starttls_offer = yes
smtp_tls_CAfile = /etc/ssl/certs/ca-bundle.crt
次に、sasl_passwordファイルを作ります。
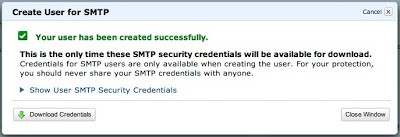
SMTP用のIAMを作るためにAWS ConsoleのSESのSMTP Settingsから「Create My SMTP Credentials」ボタンで
アクセスキーとシークレットキーを取得します。
muramasaさんによると、ここではIAMで普通に作成してもダメで、SESのSMTP Settingsから作成しないと
行けないそうです。
そして、取得したアクセスキー、シークレットキーを元に、sasl_passwordファイルを作成します。
# echo "email-smtp.us-east-1.amazonaws.com:25 xxxxxxxxxxxxxxxxxxx:yyyyyyyyyyyyyyyyyyy" > /etc/postfix/sasl_password
sasl_passwordファイルを検索テーブルに設定します。
# postmap hash:/etc/postfix/sasl_passwd
再起動します。
# /etc/init.d/postfix restart
これでメールを送ってみます。
  # php -a
> mail("memorycraft@gmail.com", "Subject2", "Body", "From: server@memorycraft.jp");
この場合、メールが届きません。
そこで、/var/log/mailogを見てみると、SASL認証に必要なライブラリが無いようです。
  Jan  9 03:06:09 ip-10-132-134-107 postfix/smtp[11252]: warning: SASL authentication failure: No worthy mechs found
  Jan  9 03:06:09 ip-10-132-134-107 postfix/smtp[11252]: 9CA2413E5: SASL authentication failed; cannot authenticate to server email-smtp.us-east-1.amazonaws.com[54.243.73.188]: no mechanism available
以下のように、ライブラリをインストールします。
# yum -y install cyrus-sasl-plain cyrus-sasl-md5
もう一度送信してみますが、メールは届きません。
maillogには以下のようになっていました。
  Jan  9 04:04:51 ip-10-132-10-146 postfix/qmgr[31664]: CE9C11E25: from=, size=362, nrcpt=1 (queue active)
  Jan  9 04:04:54 ip-10-132-10-146 postfix/smtp[31726]: CE9C11E25: to=, relay=email-smtp.us-east-1.amazonaws.com[23.21.84.203]:25, delay=2.5, delays=0.03/0/1.6/0.87, dsn=5.0.0, status=bounced (host email-smtp.us-east-1.amazonaws.com[23.21.84.203] said: 554 Message rejected: Email address is not verified. (in reply to end of DATA command))
Email address is not verified.となっており、メールアドレスが認証されていないようです。
これは、Fromヘッダでしか送信元を設定していない為で、Return-Path(エンベロープFrom)に
送信元メールアドレスをセットしてあげる必要があるようです。
この場合、送信コマンド側でMTAにReturnPathを渡します。
PHPのmailコマンドの場合は以下のように第4引数で-fオプションを渡します。
  # php -a
> mail("memorycraft@gmail.com", "Subject30", "Body", "From: server@memorycraft.jp", "-fserver@memorycraft.jp");
そうすると正常に送信され、届いたメールのヘッダも以下のようにpassになりました。
Received-SPF: pass (google.com: domain of 0000013c1b944998-1b5393d9-728a-496a-8c9d-2bbf57427150-000000@amazonses.com designates 199.255.194.183 as permitted sender) client-ip=199.255.194.183;
Authentication-Results: mx.google.com; spf=pass (google.com: domain of 0000013c1b944998-1b5393d9-728a-496a-8c9d-2bbf57427150-000000@amazonses.com designates 199.255.194.183 as permitted sender) smtp.mail=0000013c1b944998-1b5393d9-728a-496a-8c9d-2bbf57427150-000000@amazonses.com
Return-Path: 0000013c1b944998-1b5393d9-728a-496a-8c9d-2bbf57427150-000000@amazonses.com
因みにcakePHP、FuelPHPの場合は下記のようにするようです。
・cakePHP
$config['additionalParameters'] = '-f '.$from_address;
$email = new CakeEmail();
$email->transportClass()->config($config);
$email->from(array($from_address=>'Information'))
->to($target)
->subject($mail_title)
->send($mail_message);
・FuelPHP
$email = Email::forge();
$email->from($from_address);
$email->to($target);
$email->subject($mail_title);
$email->return_path($from_address);
$email->body($mail_message);
$mail->send();
なんとか解決し、安心しました。
意外と見落としがちなメール送信ですが、いざという時、どの方法を取っても新規からではなんらかの申請が
必要になり、即時反映は難しそうでした。
こういった場合の為に、常に一時的なリレー用のSESを確保しておくのは有りかも知れません。
こちらの記事はなかの人(memorycraft)監修のもと掲載しています。
元記事は、こちら